Table of Contents
Excellent Ways to take screenshot on Windows
Here are the following ways showing How to screenshot on windows
1. Snip and Sketch
- The new Snip and Sketch tool is easy to access and makes it easier to share screenshots, but it lacks an important feature that keeps me a fan of the Snipping Tool.
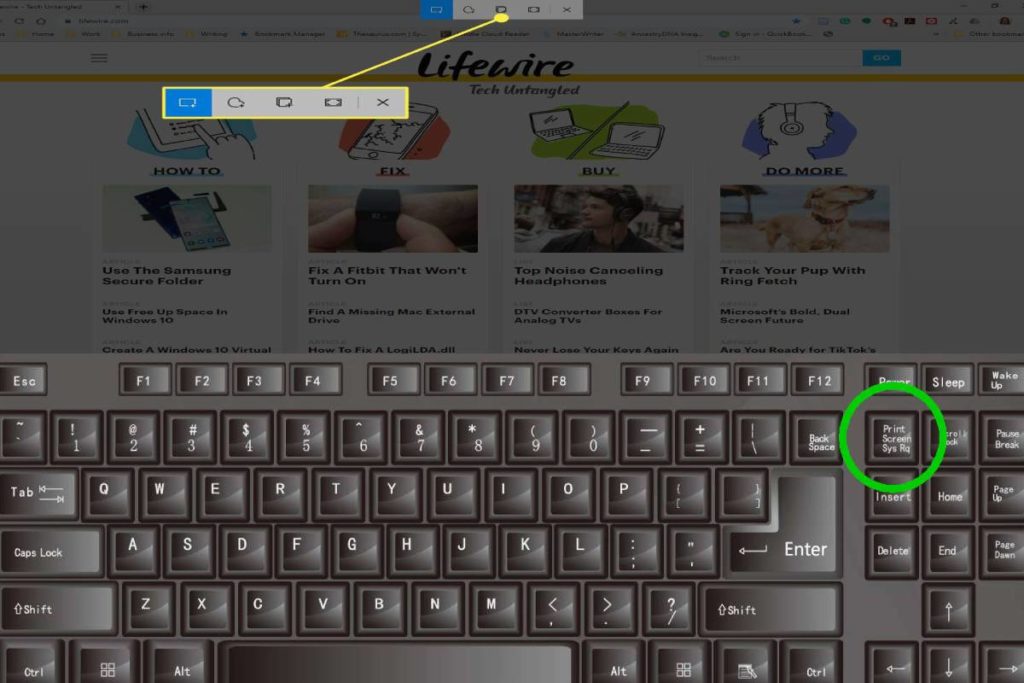
- From the Snip and Sketch window, click on the New button in the upper left to start a screenshot.
- The Snip and Sketch window disappears, and instead, you’ll see a small menu at the top of the screen.
- It lets you choose what type of screenshot you want to take: rectangular, free-form, or full-screen.
- Surprisingly, it doesn’t offer any way to capture a window screenshot, which is a good option with the Snipping Tool.
- You can also click the arrow button present next to the New button in the Crop and Draw window to delay a crop for 3-10 seconds.
2. Snipping Tool
- The tool known in English as Snipping Tool has been around since Windows Vista.
- Click the New button to start the screenshot process.
- The default cutout type is a rectangular cutout, but you can also do free-form and full-screen cutouts along with a window cutout.
- The Snipping Tool does not automatically save screenshots; you will have to save them in the tool before exiting manually.
- And also, it will automatically copy your captures to the clipboard.
3. Game bar
- You can use the below game bar to take a screenshot, whether you are playing a video game or not.
- Press the Windows key + G key to invoke the Game bar.
- Then, click the screenshot button on the screenshot button found in the Game bar or use the default Windows key + Alt + PrtScn shortcut to take a screenshot of the full screen.
- To configure your own screenshot shortcut from the Game window, go to Settings> Gaming> Game Bar.
- You will have to enable the Game bar from the settings page by activating Record game clips, screenshots, and broadcast using the Game bar (Record game clips, screenshots, and broadcast with the Game bar).
Instructions for taking a screenshot of an error in Windows
- Click on the error window.
- To take a full-screen capture, press the Print Screen button (may also be labeled Print Screen or PrtScrn) on the keyboard.
- It can be near the top, to the right of all the F keys (F1, F2, etc.), and often in line with the arrow keys.
- To take a snapshot of only the active program, hold down the Alt button (located on either side of the space bar) and press the button.
- To view this snapshot or save it as an image, you can use Microsoft Paint (Paint) or any other graphics program.
- We recommend that you use the Paint program.
- To open the Paint program on the system, go to Start -> Programs -> Accessories-> Paint
- On the blank page in Paint, click Edit and then click Paste, and the screenshot will appear on the blank page.
- To save, follow the usual steps to save an image or graphic (click File, Save As, or Save.)
- Select the desired location (drive/folder) to save the file. The default location is the Desktop. Enter the name you want in Filename.
- You can also select the type of image you want by clicking Save as type in the drop-down menu.
- Here, we are saving the file ‘screenshot01’ as type PNG (recommended).
Also Read: Best Chromebook – Selection, Features, and Best Chromebooks of 2021

Review How to Screenshot on Windows – Three Excellent Ways to take screenshot on Windows. Cancel reply